Tuesday, March 30, 2021

LEICA Q2: 47 MEGAPIXELS + WEATHER SEALING


By David Farkas, LeicaStore Miami

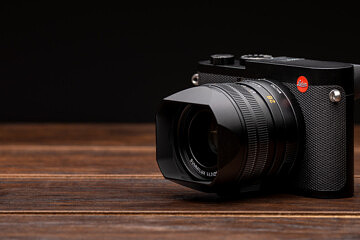
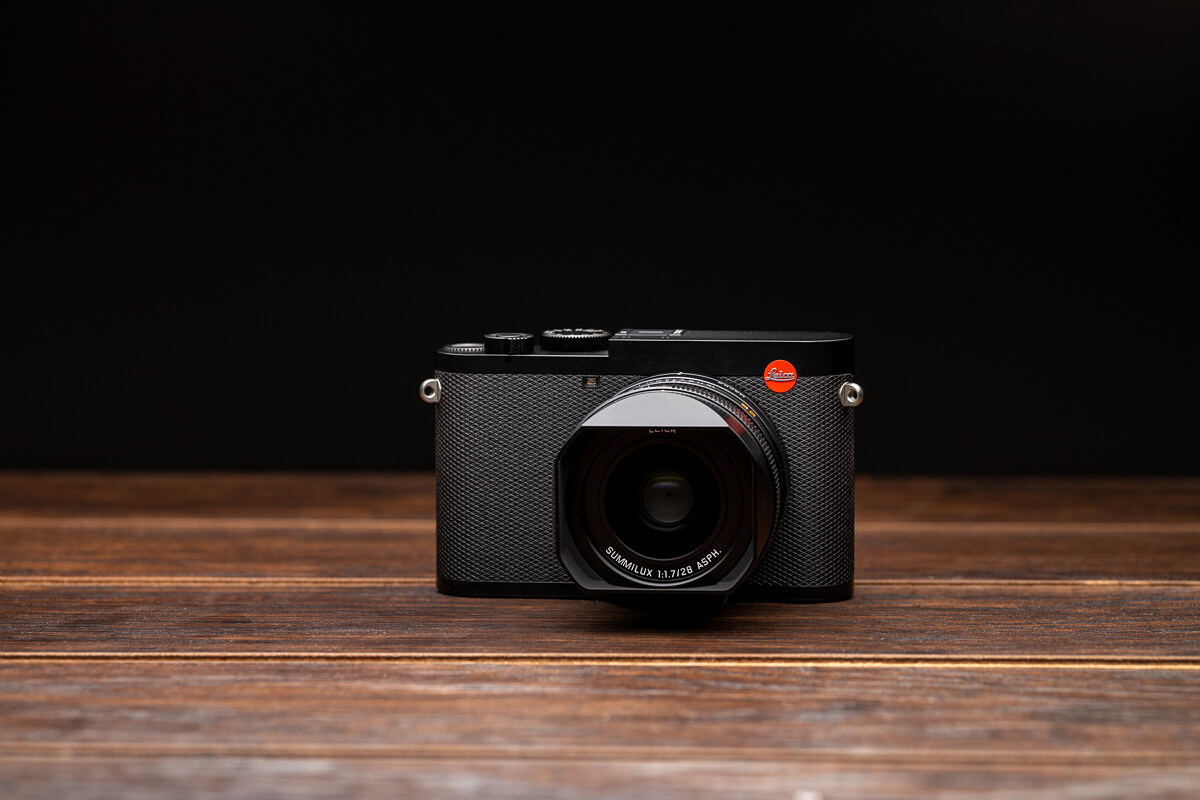
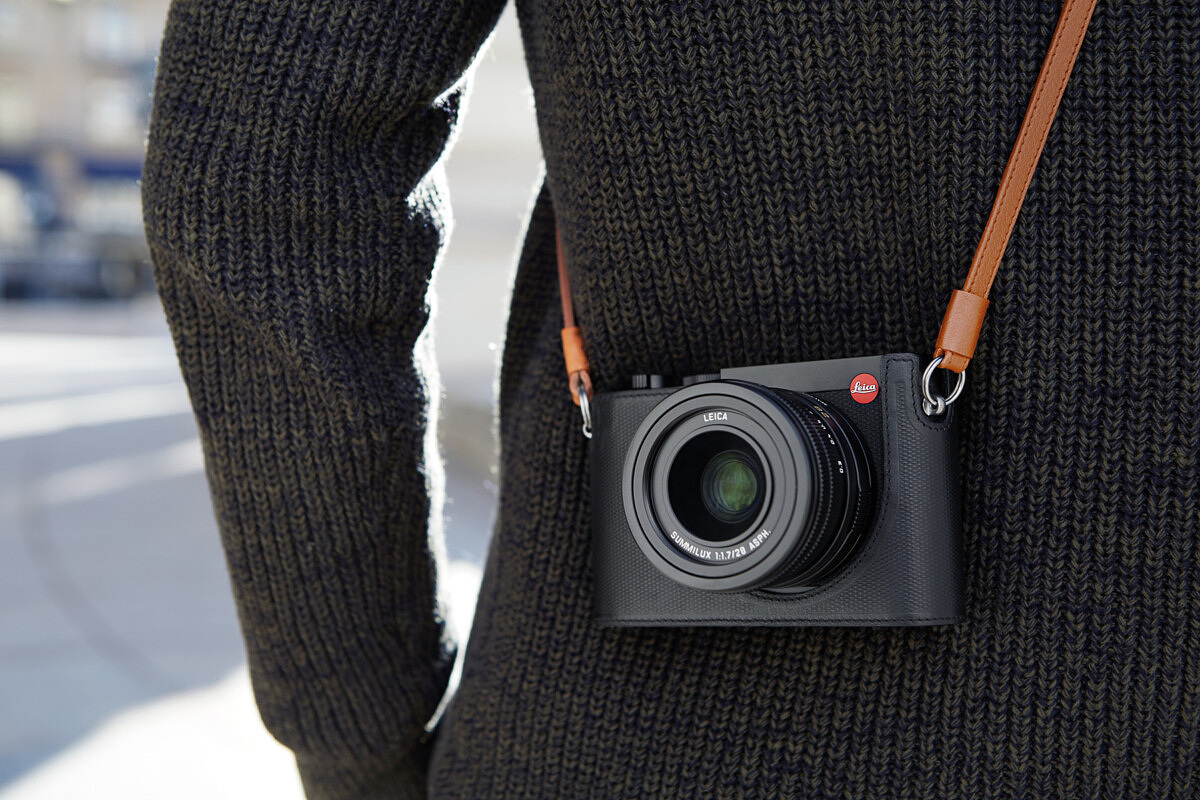
When Leica Camera announced the Leica Q2, it was the highly anticipated successor to the popular Leica Q (Typ 116). The new model keeps the same compact form factor and exceptional 28mm f/1.7 Summilux ASPH lens, but offers notable and quite significant improvements over its predecessor. 


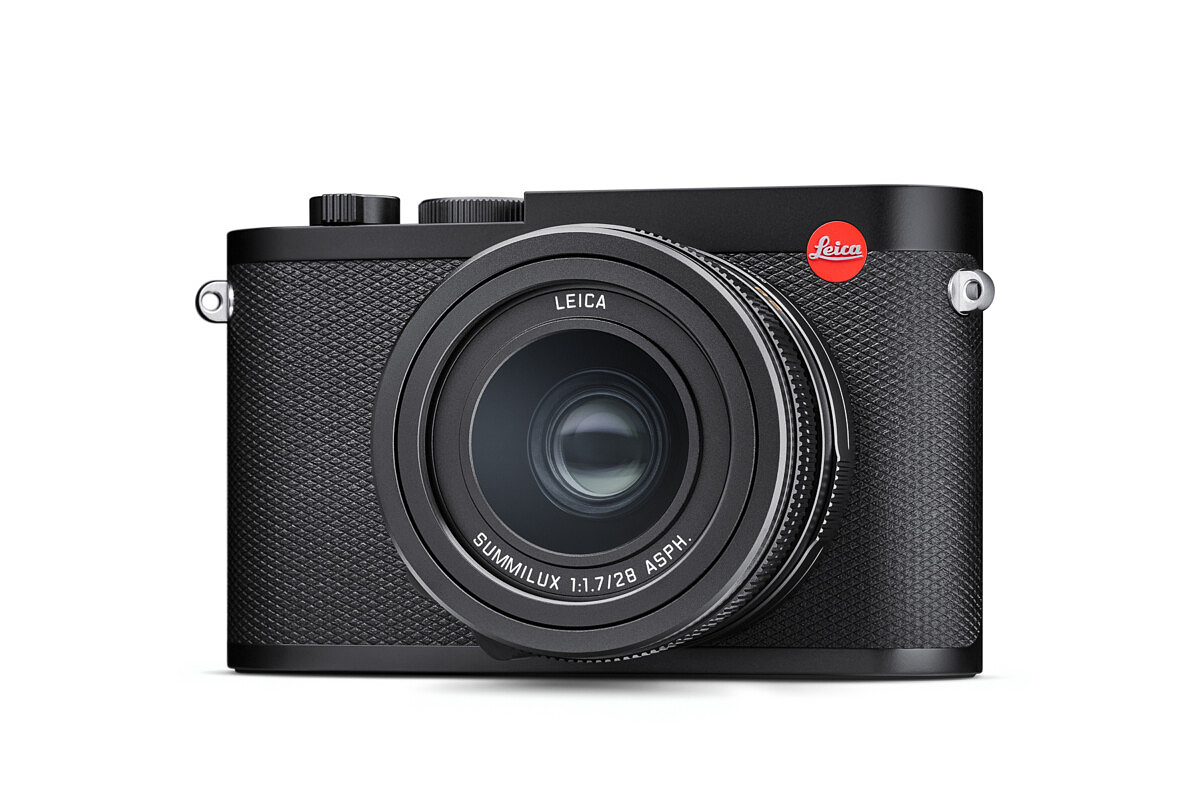
The headlining changes include the brand new 47 megapixel full-frame CMOS sensor with updated Maestro II image processor, a stunning 3.68 MP OLED EVF, revised camera controls, and a larger battery from the SL, not to mention full weather and dust sealing. As good as the original Q was, and still is, the Leica Q2 is a giant leap forward. Let’s take a look at some of the bigger changes. You can also check out our hands-on video here:

New Sensor

At the heart of the Leica Q2 is a newly developed 47.3 megapixel full-frame CMOS sensor, offering almost double the resolution of the Q (Typ 116). The additional pixels now make using the built-in crop modes a much more realistic option. At the 35mm setting, you’ll now get 30MP and at 50mm expect 15MP. There’s also a new mode, 75mm, which will result in a 7MP final image. If you do use the crop modes, the on-screen review will show the cropped images, but rest assured that the DNG recorded to the SD card still contains the uncropped, full image off the sensor.


The maximum ISO remains unchanged at 50,000, but we’re expecting a slight improvement in performance. Even if noise remains the exact same as the previous 24MP sensor in the Q, the result should still be better. Keep in mind that magnification at viewing size, be it online or in print, will be much less due to the increased pixel count. This means that any noise will be smaller and less noticeable. We’ll reserve judgement until we can fully evaluate for ourselves, but our initial impression after some quick test shots show about a one stop improvement.
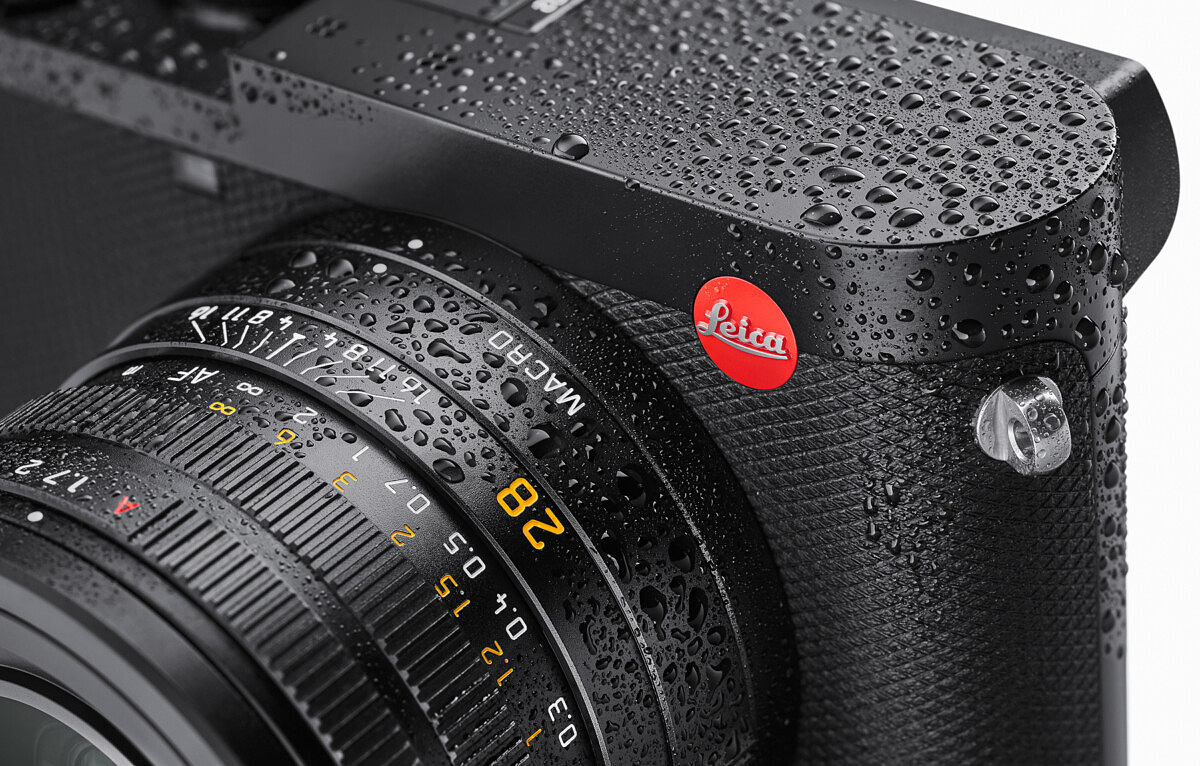
Weather Sealed Body

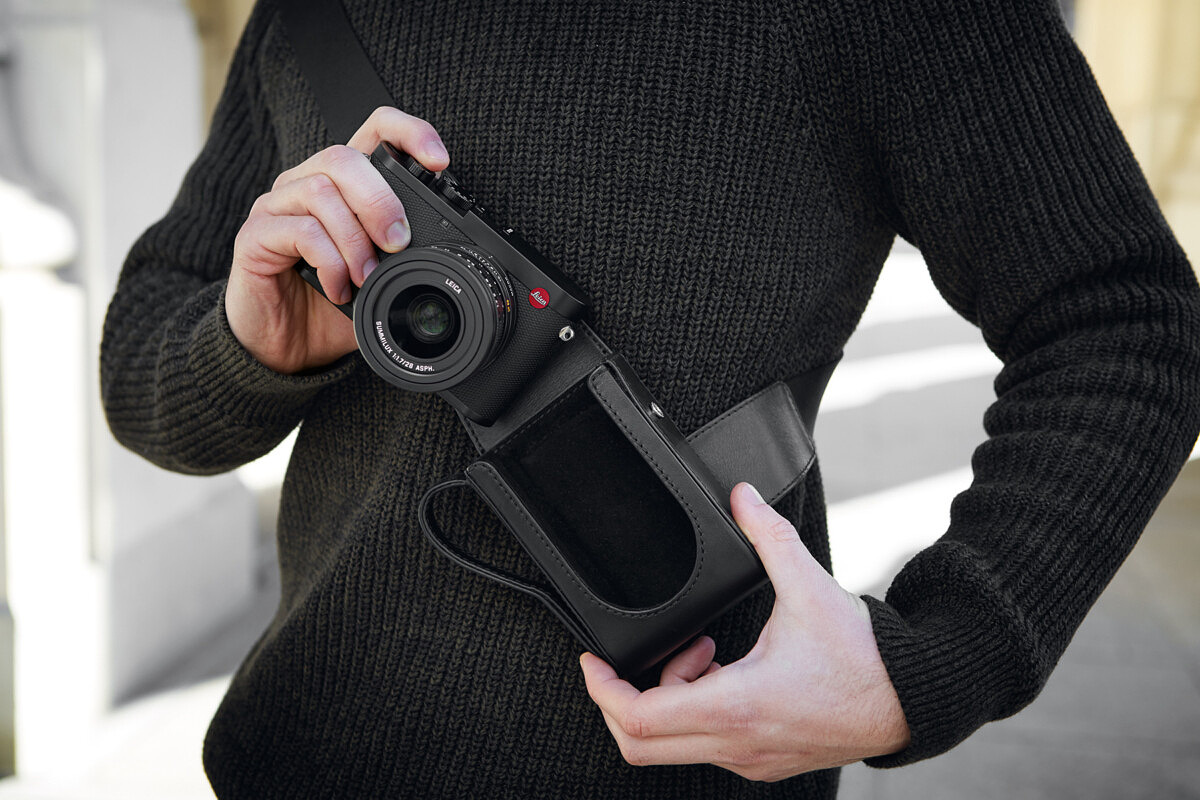
Full weather sealing has been a frequent request from the Q community, and Leica has listened. Everything from the battery compartment to the lens now has extensive gasketing like the larger S and SL cameras. This makes the Q2 an even more ideal travel companion now that you don’t have to worry about putting it away if the weather goes south. Part of the sealing process has been to remove the port door on the side of the camera. So, the Q2 no longer has USB or HDMI out.


New OLED Viewfinder

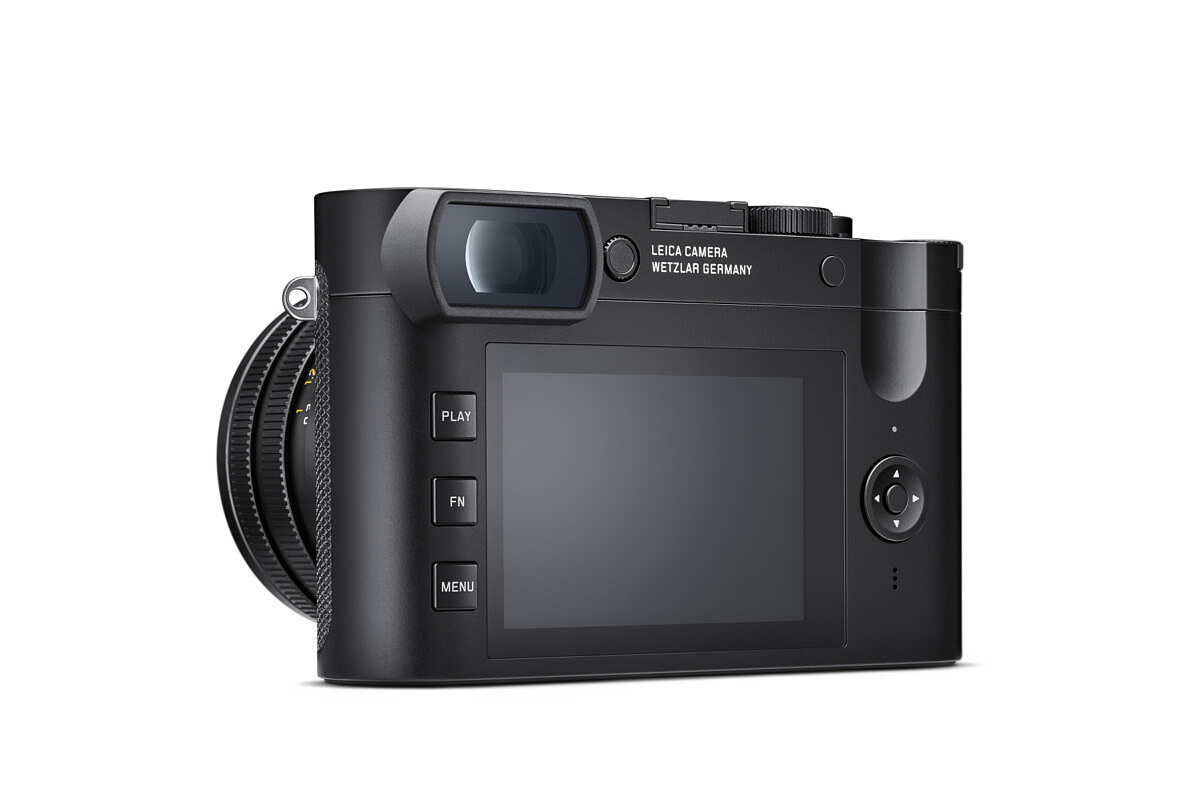
The EVF resolution of 3.68MP is unchanged from the original Q, but the move from an LCD to an OLED panel has resulted in a massive jump in viewfinder quality. One look through the finder and you can immediately see the improved color gamut and accuracy, with a brighter and clearer image. Greater magnification and additional eye relief also contribute to a fantastic viewfinder experience, which is crucially important on a live view camera.


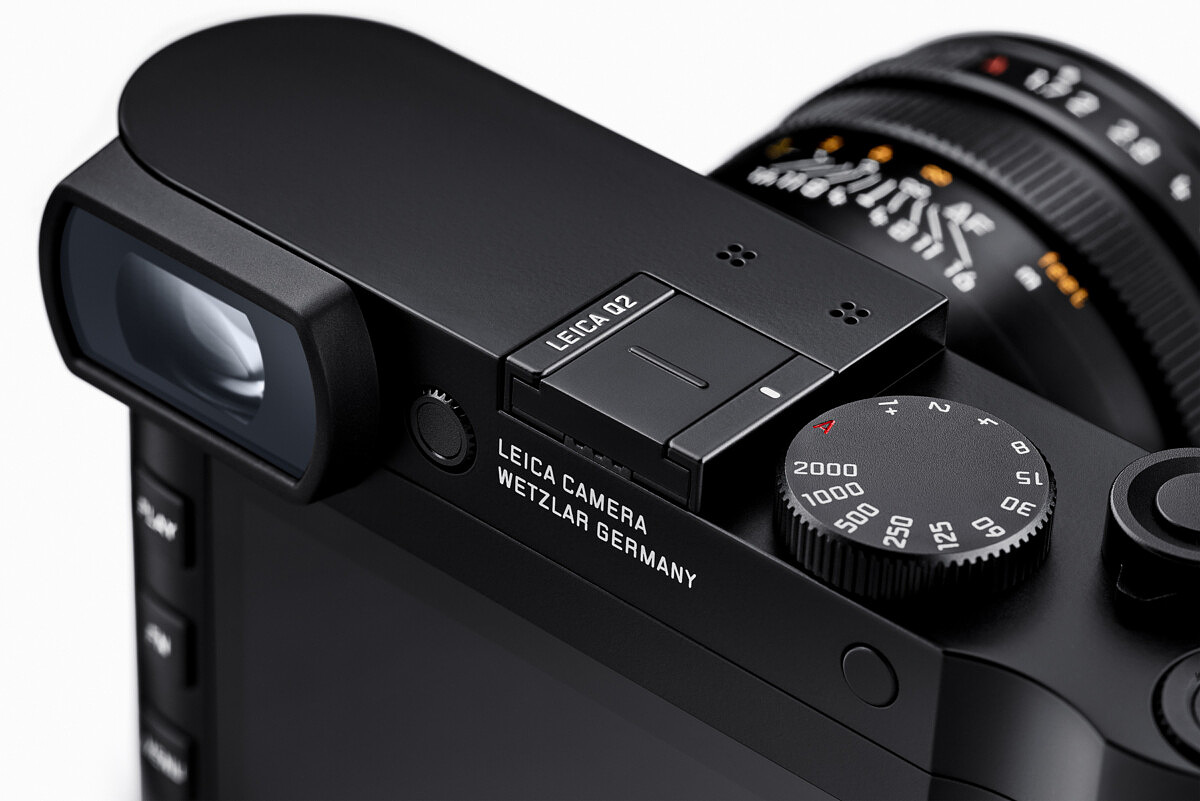
The updated diopter correction dial features an ingenious design. The dial is fully recessed into the back of the camera. A single click and it pops out, can be turned to adjust, then clicked back into place. This eliminates the possibility of accidentally knocking the diopter yet still allows for easy tweaking.

New battery

Due to the higher power requirements of the 47MP sensor, the Leica Q2 has switched from the BP-DC12U to the BP-SCL4. This is the same battery used in the SL and should result in longer run times and more shots per charge. The move also makes a lot of sense, since so many Leica SL users keep a Q as a second body. Being able to share batteries and chargers sure beats having to carry two completely different power setups. The only drawback here is the increased cost of the larger batteries.

4K Video

We now have some additional video options on the Leica Q2, with the ability to shoot Cine 4K and 4K UHD, as well as Full HD at 120fps. Interestingly, all the video modes use almost the entirety of the sensor, with very little cropping, even at 4K. This was a nice surprise and adds to the utility of the camera. Unfortunately, no HDMI output and no microphone input limit recording to SD card and sound to the stereo microphones on top of the camera. Even though its use for vlogging might be limited, the Q2 could make a very interesting B roll camera with its wide, fast and close focusing lens.


Faster everything

Thanks to the refreshed Maestro II family image processor, the Leica Q2 is blazingly fast in all areas. Even with twice the pixels, the processor manages to still churn through 10 frames per second at maximum burst. And that speed translates to the autofocus system as well, with the Q2 locking in quicker than the Q. The electronic shutter has been juiced up too, from 1/16,000th to an insane 1/40,000th of a second. Honestly, I can’t imagine a practical application for ever needing such a high shutter speed, but it’s cool, nonetheless. To record such massive image data, about 85 MB per DNG file, the Q2 employs full UHS-II SD card compatibility. The speed difference? In our testing, we saw an almost 60% faster image recording rate with a 300MB/s UHS-II card versus an already quick 95MB/s UHS-I card.
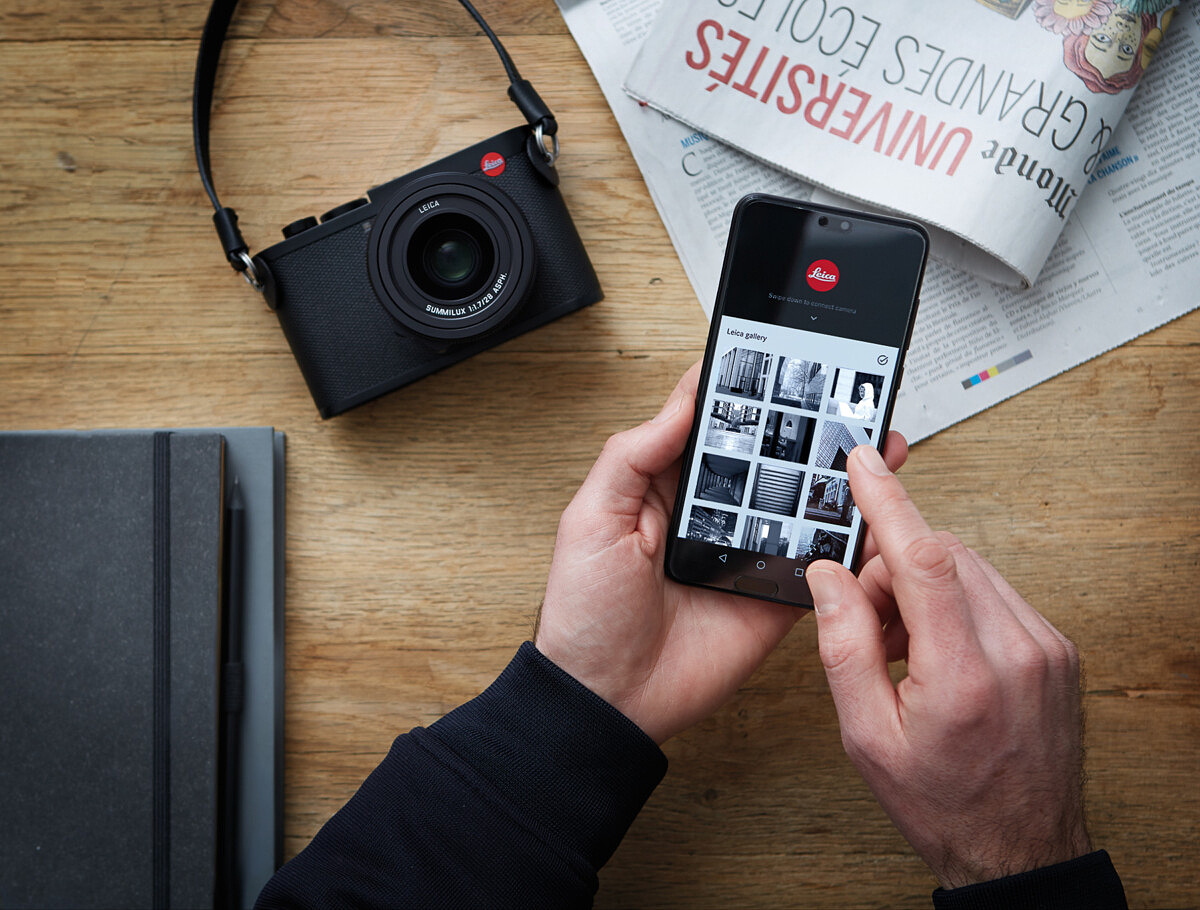
Better connectivity

Every current Leica digital camera now has built-in Wi-Fi and connects to the Leica FOTOS app for iOS and Android. But the Leica Q2 goes one step farther by incorporating Bluetooth LE (Low Energy). The Wi-Fi/BT combo facilitates an always-on connection so when you fire up the app, the camera instantly responds. Unfortunately, since the new FOTOS v1.2 app won’t be released until April 3, we weren’t able to test this new feature.


Revised controls

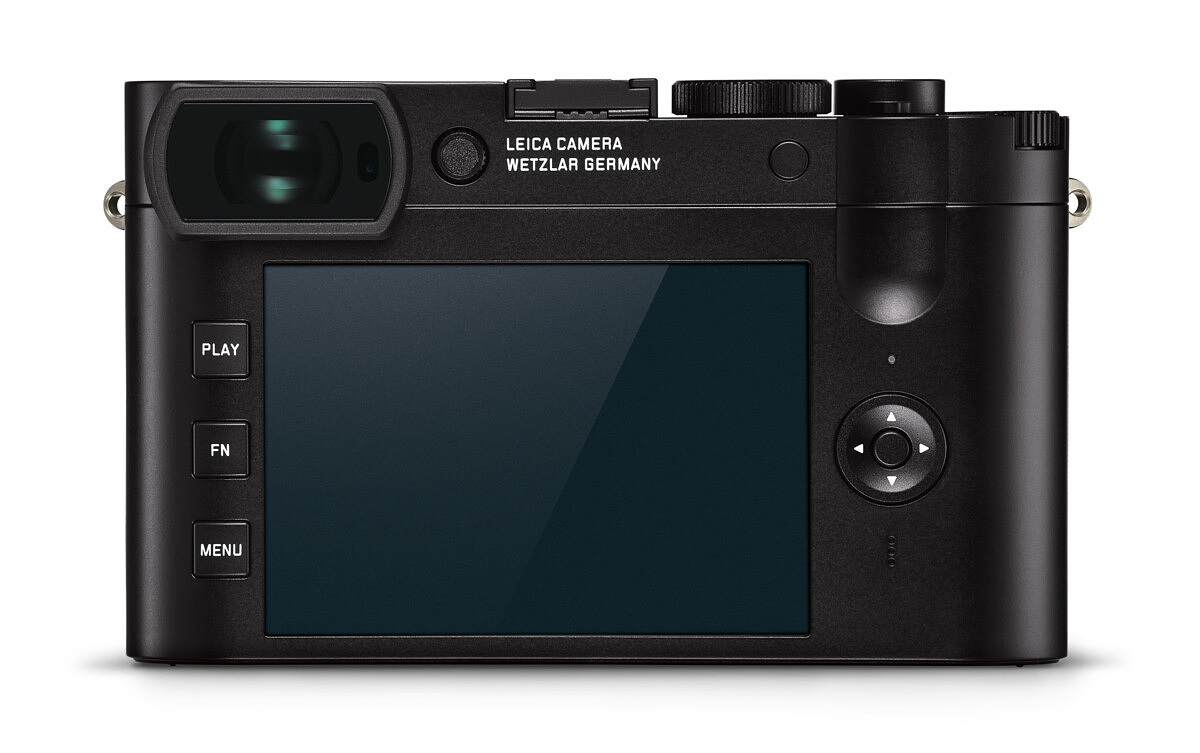
Besides the under-the-hood upgrades we’ve already covered, the Leica Q2 also gets some external changes. Most are functional and not merely cosmetic. On the back of the camera, the five rear buttons of the original Q have given way to the three-button setup that are now standard on the M10 and CL: PLAY, FN and MENU.


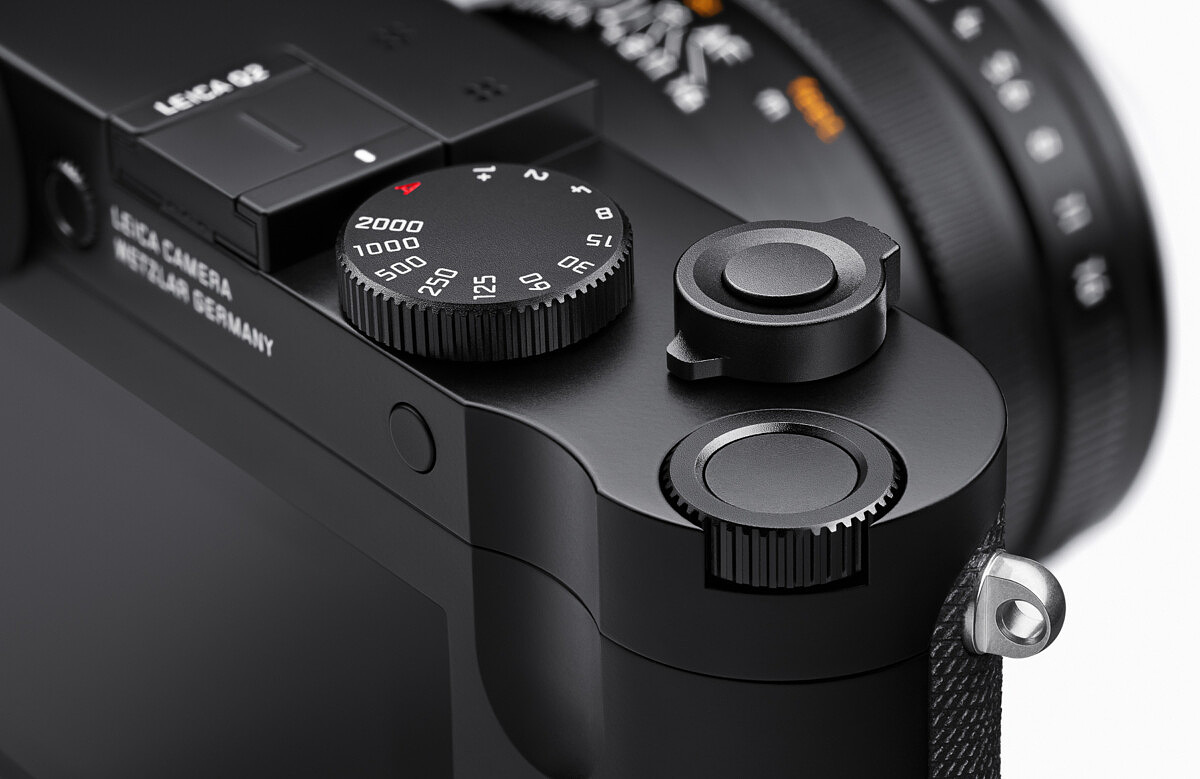
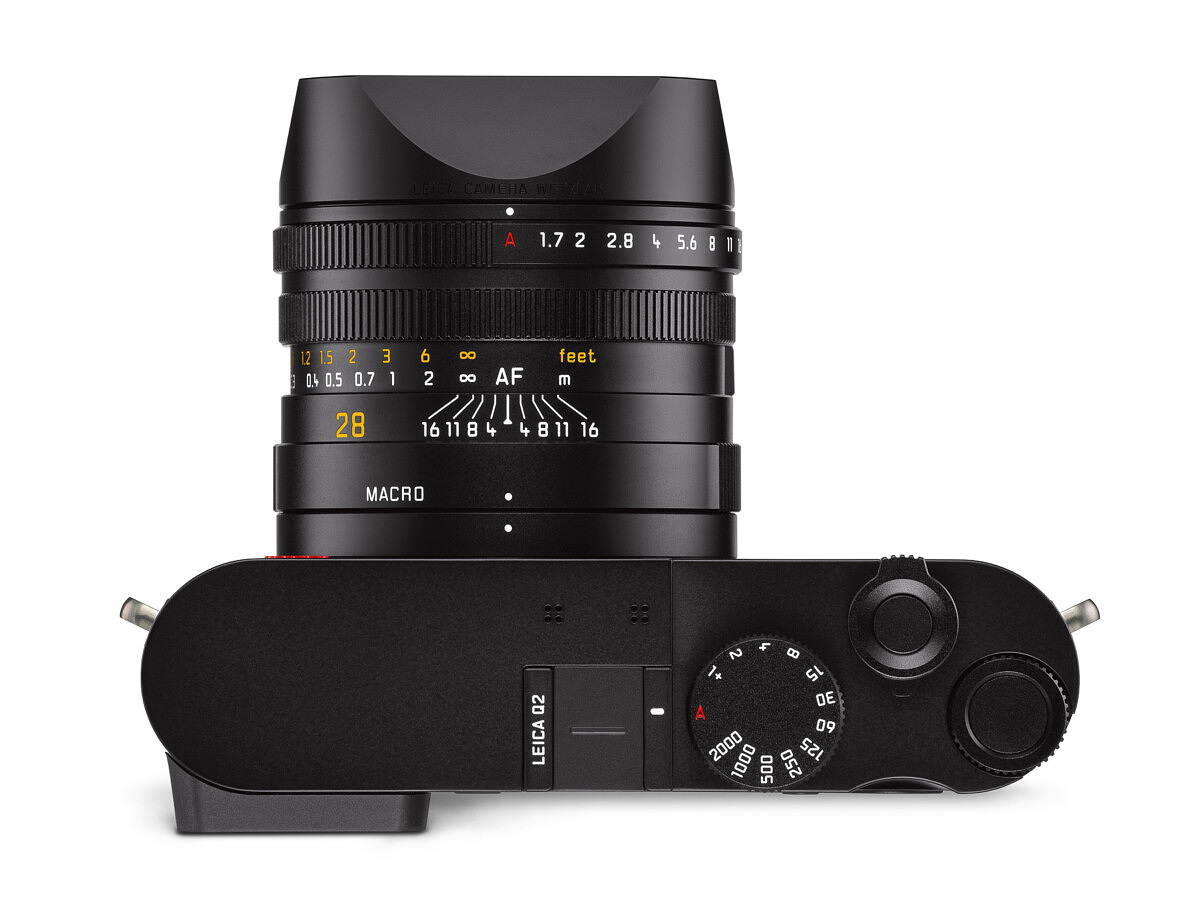
As mentioned above, the diopter has been moved from its previously difficult to reach placement on the side of the eyecup to its right, recessed in the body. Moving to the top of the camera, the changes are subtler. The shutter speed dial remains in same spot but gets a little makeover and more significant detents. A single stage on/off switch takes the place of the old three-position one. And the shutter release echoes that of the recent Q-P. Here, we can also see that the video button is gone, but the top/rear thumb wheel now includes the center function button that works so well on the CL. The wheel itself is much firmer, and has been moved slightly forward, both in an effort to address any inadvertent dial turns as well as increasing tactile feedback.


On the lens, the aperture and macro mode rings have been widened for improved handling. All three lens controls feel smoother and with more pronounced detents.


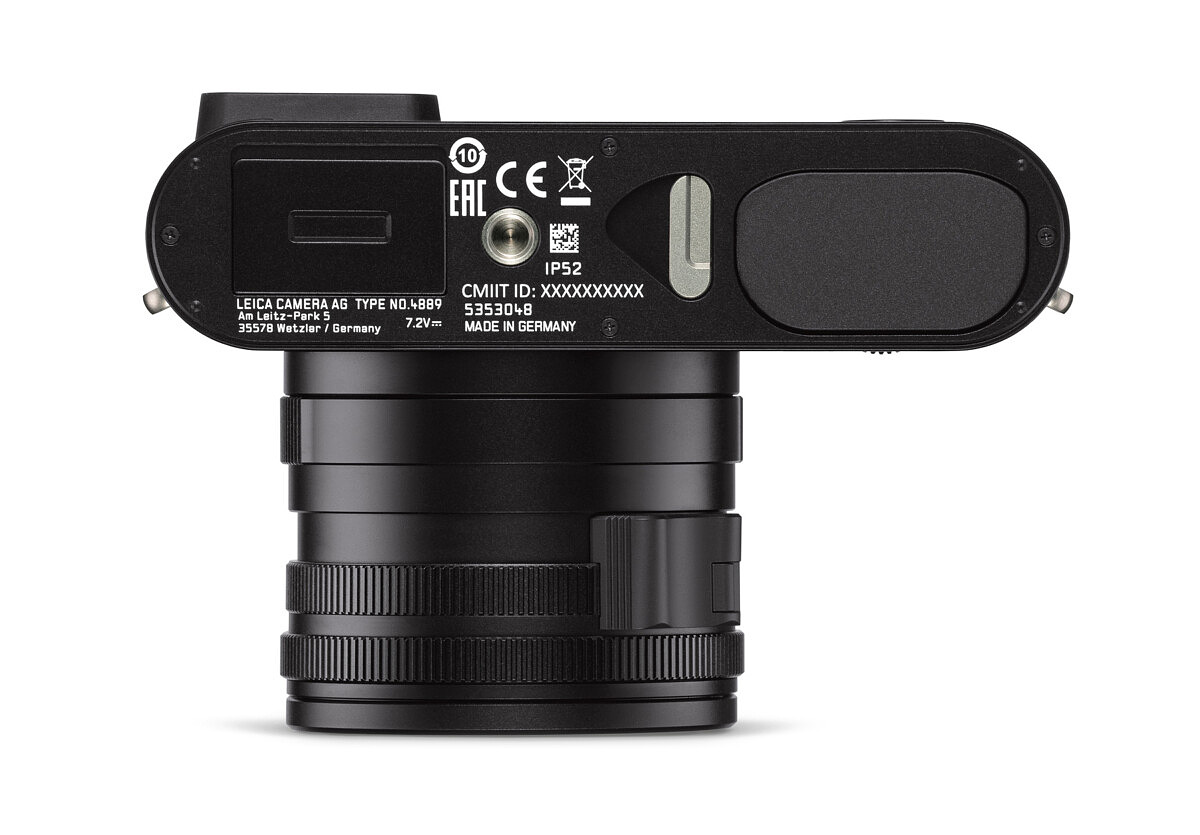
The bottom of the camera has some obvious changes. Absent is the battery/card door combo. In its place, the BP-SCL4 battery now slots directly into the Q2, as it does on the SL. A metal latch releases the battery, but a soft press upwards is still necessary to fully remove it. This prevents accidentally dropping the battery on the ground, or worse. On the other end, a new rectangular metal door hides the SD card slot. The door requires a slide towards the back to open. Both the openings are fully weather sealed.


Final Thoughts and Ordering

The Leica Q2 offers some incredible improvements over the already capable Leica Q (Typ 116). The jump to 47MP now makes the Q2 the highest resolution Leica digital camera, at least until the S3 comes out in a few months. And this certainly opens the question about where the SL and M systems are headed in the future. Will we see the same sensor make its way into other Leica cameras, like what happened with the first Q and SL? Only time will tell, but for now, the Q2 at $4,995 represents an incredible value. Throw in weather sealing, the gorgeous OLED viewfinder, higher-capacity battery, much improved handling, as well as faster everything, and the revised Leica Q2 promises to be just as big a hit as the original. 


Deliveries have already started in very limited quantities. If you are interested in placing an order for the Leica Q2, you can do so at Leica Store Miami, by calling them at 305-921-4433, sending an email, or by clicking the link below.


 For other articles on this blog please click on Blog Archive in the column to the right


To comment or to read comments please scroll past the ads below.

All ads present items of interest to Leica owners.

_______________________________________________________________________

Woman wears brown elk-leather camera strap around her shoulders.
      www.eddycam.com        


Buy vintage Leica cameras from 
America's premier Leica specialist 

 http://www.tamarkin.com/leicagallery/upcoming-show


Click on image to enlar
Please make payment via PayPal to GMP Photography

Click on image to enlarge
Please make payment via PayPal to GMP Photography
Click on image to enlarge
Please make payment via PayPal to GMP Photography


Sunday, March 28, 2021

HOW TO GET THE MOST OUT OF YOUR INVESTMENT IN LEICA M CAMERAS AND LENSES


By Heinz Richter

Leica M cameras definitely take a special position on today’s camera market.  As a camera with an optical rangefinder and viewfinder and interchangeable lenses, they are virtually without any competition.  DSLR and mirrorless cameras rule the camera market.  Yet the Leica M steadfastly maintains its position as one of today’s top cameras.

Considering the myriad of modern features on other types of cameras, the Leica M could be considered an anachronism, a camera that is trying to hang on to its past glory.

The camera is definitely not for everyone, yet some of the greatest photographers have done and are doing their work with the Leica M.  I grew up with a rangefinder and even after owning and shooting several Leica SLR cameras, I always gravitated back to the Leica M.

An often mentioned drawback of the camera is the limited number of lenses, ranging from 21mm to 135mm.  Longer lenses can be used, but they require an adapter and an electronic viewfinder accessory which is only available for the latest versions of the Leica M, starting with the Leica M240.  Earlier M cameras did require the Visoflex which converted the cameras to an SLR, but it was rather bulky and not overly convenient to use, compared to a typical SLR DSLR camera.

Leica M 240 with 200mm f.3.8 Novoflex and electronic viewfinder

The other major drawback of the rangefinder design is a definite lack of close-up capabilities.  Here the same accessories as for long lenses are the only help available, although in the past some other accessories like the Dual Range Summicron offered some help.  But the Dual Range Summicron cannot be used on any of the Leica digital rangefinder models.

The final drawback of the Leica M cameras is the relatively high price of the camera and its lenses.  They rank among the most expensive on the market.

Since most of us are not blessed with unlimited incomes, it makes sense to look at how to make the most out of our camera budgets.

The greatest saving can be realized with the lenses.  Fortunately Leica lenses are among the best in the world. Their performance is unrivaled when it comes to contrast, resolution, and tonal depth. While the extra input that is necessary to assure this high performance level does have a negative effect on the cost, it is this high level of performance that also allows us to save considerable amounts of money.

After selecting the Leica M camera that best meets our needs, particular attention should be paid to the selection of lenses.  Of course if you can get by with just one lens, read no further.  Other than selecting a lens based on cost, there are no other savings to be had.

One drawback of the rangefinder lay-out is the fact that no zoom lenses are available. If we need a variety of focal lengths, we need a variety of lenses.  Most people agree that a 35mm of 50mm lens are the best choice for a standard lens. For anything wider, there are 28mm and 21mm lenses, just as there are 75mm, 90mm and 135mm lenses for telephoto work.  Even if we had the ability to afford owning all or most of these lenses, changing lenses does take time and could possibly prevent us from getting a great shot.

This s where the overall performance of Leica lenses comes into play.  I have made a 50mm f/2 Summicron the central part of my lenses.  For a wide angle I skipped the 35mm and got a 28mm lens instead.  As a matter of fact, I often just use the 28mm exclusively, like when I travel. 

Why does that work?  Do I not lose out on shots that would be better done with a 35mm or 50mm lens?  For me the answer is ‘no’.

I rarely make enlargements bigger than 8.5x11 inches in size.  My house has only limited wall space; why make an enlargement if you don’t display it.  Instead I apply cropping to get to the field of view of a 35mm or 50mm lens or anything in between for that matter.  The performance level of my 28mm f/2.8 Elmarit is such that I can easily do that without sacrificing image quality.  As a matter of fact, this has often allowed me to come up with more than just one extra photograph.  I often find more than just one picture hiding in a single shot.

Leica M8, 28mm f/2.8 Elmarit, not quite full frame

Same file cropped

Same file, cropped even more
Three different photographs from the same file

Leica M240, 28mm f/2.8 Elmarit, full frame

Same frame, cropped

Leica M8, 28mm f/2.8 Elmart, full frame

Same frame, cropped, converted to black and white

Leica M240, 28mm f/2.8 Elmarit, full frame

Same frame, cropped

Same frame, cropped even more

Leica M240, 28mm f/2.8 Elmarit, full frame

Same Frame, cropped and converted to black and white

The same is the case when close-ups are in order.  Here I use my 50mm Summicron most of the time.  I focus as close as possible and then crop the image to get the close field of view I wanted.

Leica M240, 50mm f/2 Summicron, full frame

Same frame, cropped

On the other end of the spectrum I have both a 90mm and a 135mm f/2.8 Elmarit.  Depending on my needs to get closer, I use one or the other lens and, if necessary, crop the resulting image to get a smaller field of view.

Leica M8, 135mm f/2.8 Elmarit

Same frame, cropped

Leica M8, 90mm f/2.8 Elmarit

Same frame, cropped, converted to black and white

Not only did this approach allow me to limit the number of lenses I needed to buy, it also allows me to overcome the lack of zoom lenses for my camera.

The late models of the Leica M camera line are often criticized for not offering autofocusing.  It is certainly correct that a line of autofocus lenses would eliminate any of those criticisms.  But is the lack of autofocus really such a hindrance?

With the advent of autofocus one little trick to speed up focusing of our cameras has all but been forgotten.  I am talking about hyperfocal  lens settings with the help of a depth of field scale.  Most lenses available today no longer have depth of field scales and thus make focusing via hyperfocal settings impossible.  Fortunately, most Leica lenses still offer this advantage and its application can overcome the lack of autofocus to quite an extend.

A lens can only be accurately focused at one certain distance.  Everything in front and behind that point of focus is effectively out of focus.  Yet we all know that the pictures we take show scenes and subjects to be sharply in focus over a considerable distance.  Are our books of physics wrong?  Not at all.  The reason for this apparent contradiction is our eyes.  Fortunately they aren't good enough to recognize out of focus areas in our pictures unless they reach a certain level.

Imagine photographing a small point.  When not properly in focus, this point will become larger and show up as a fuzzy disc.  This disc has to be of a certain size before our eyes recognize it as out of focus.  This representation of a point is referred to as the circle of confusion.

In these days of virtually everything being auto focus we rarely pay any attention to focusing anymore.  As a matter of fact, many outsiders consider the Leica M rangefinder cameras with their manually focusing lenses an anachronism.  Yet in quite a variety of situations these lenses can be focused as fast or faster than any auto focus system.

That is because the Leica M lenses are non-zoom lenses.  That is the reason why to this day all of them have a depth of field scale.  Many photographers and picture takers have no idea what a depth of field scale is, and if they do, they rarely know what to with it.

It is a known fact that the aperture setting on our lenses, the f-stop used to take a picture, determines how much of what we photograph will be in focus, how much depth of field there will be.  The smaller the aperture, the more depth of field.  That is what a depth of field scale is all about.  It will show the distance from the point closest to the camera to the point furthest from the camera that will be in focus.

Increase of depth of field by decreasing aperture size

Effectively one third of the total depth of field will be in front of the point of focus and two thirds will be beyond it.  If applied correctly, this can actually greatly improve the sharpness of our photographs.  Imagine taking a picture of a mountain scene.  The mountains are obviously far enough away to constitute infinity as far as the focus settings on our lenses are concerned.  Subsequently it seems to make sense to set our lenses to infinity to make sure the mountains are in focus.  As a matter of fact, if we use the rangefinder on a Leica, this is exactly what will happen.

However, let’s remember the above rule which states that two third of the depth of field is beyond the point of focus.  That means in our mountain scene, two thirds of the depth of field will be wasted.  The depth of field scale will help to prevent that, if properly applied.Our exposure settings will always be a combination of shutter speed and aperture.  Once we or the camera determine the correct exposure settings, we will know what aperture the picture will be taken with.  Back to our mountain scene.  Instead of setting the infinity mark opposite the focus mark on the lens, all that needs to be done is to set the infinity mark opposite the marking of the aperture we are using.  That will still give proper focus to infinity, but it will greatly increase sharpness in the areas closer to the camera as indicated by the other aperture mark on the depth of field scale. 

Above focused on the background
Below focused on the foreground

Focused at hyperfocal setting with one third in focus in front of the point of focus and two thirds behind the point of focus
Picture examples form "Kleines Leica Buch (Little Leica Book), 1952 edition

In this example, the boy flying his kite is obviously the main subject and therefore 
should be in focus. However, focusing on him would most likely render the 
background out of focus. Utilizing the depth of field scale assured that all is in focus.

It is a fact that the smaller the aperture, the more depth of field we will have.  But we shouldn’t indiscriminately use the smallest aperture all the time, because this can easily lead to the necessity of too slow a shutter speed which in turn can lead to blurry pictures because of camera movement.

As I explained above, the circle of confusion determines what detail in our pictures appears in focus and which not.  Unfortunately, the size of the circle of confusion must also be based on a certain picture size.  In most cases that is an approximate enlargement of five times or a 5 x 7 inch enlargement from a 35mm negative or full frame digital sensor.  With other words, up to a 5 x 7 inch size enlargement our pictures will display maximum sharpness and maximum depth of field.

But what about enlargement greater than a 5 x 7 or if considerable cropping is necessary?  Does that mean the depth of field scale on our lenses is useless?  Not at all.  All we need to do is use the depth of field settings on the lens with an aperture one or two stops larger than the aperture in actual use.  With enlargements of 8 x 10 or 11 x 14, the next larger aperture will usually be sufficient.  If the enlargement size is greater than that, use a two stop larger aperture.  With other words, if the aperture used is f/11, use the apertures of f/8 or f/5.6 on the depth of field scale.

Why do all of this instead of just using the rangefinder and focus on our main subject?  Because you can greatly increase your speed of operating the camera.  Using the depth of field scale and setting the lens as explained above, using hyperfocal setting, will eliminate the need to focus altogether and thus make the operational speed of your camera that much greater.

The above figures are based on 35mm size negatives or full frame digital sensors.  Larger or smaller negative and sensor sizes will lead to different depth of field.  Different focal lengths of our lenses will do the same.  In general, the shorter the focal length the more depth of field there will be.  This, however, is nothing to worry about because the depth of field scales will reflect that.

Give it a try.  You might very well find that your pictures in some cases will display a greater range of sharpness and you will be able to use your camera a lot quicker.  It might very well be the difference of being able to catch a great moment on film or memory card instead of losing it to your camera being too slow.


 For other articles on this blog please click on Blog Archive in the column to the right


To comment or to read comments please scroll past the ads below.

All ads present items of interest to Leica owners.

_______________________________________________________________________

Woman wears brown elk-leather camera strap around her shoulders.
      www.eddycam.com        


Buy vintage Leica cameras from 
America's premier Leica specialist 

 http://www.tamarkin.com/leicagallery/upcoming-show


Click on image to enlar
Please make payment via PayPal to GMP Photography

Click on image to enlarge
Please make payment via PayPal to GMP Photography
Click on image to enlarge
Please make payment via PayPal to GMP Photography