By Josh Lehrer, Leica Store Miami
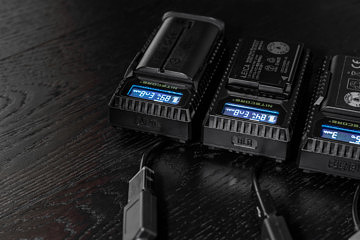
At a recent Leica Pro Discovery Day held in the store, I noticed a small, unassuming looking battery charger sitting on a table – with an SL battery charging in it. This was the first time I had ever seen a third-party charging solution for SL batteries, which naturally piqued my interest. Upon closer inspection I could see it was manufactured by a company called Nitecore. And that instead of a traditional wall outlet plug, it was charging over a USB cable. Further research later on led me to their full product catalog, and as it turns out, Nitecore makes compact USB battery chargers for a wide variety of Leica camera batteries. It wouldn’t be long before I had the full compliment of Leica chargers sitting on my desk for some testing.
Immediately I was struck by the small size and light weight of the chargers, especially considering they all have built-in USB cables and a small screen that conveys important information about the battery and charging status. All five chargers are about the same size and weight, measuring in at 85x50x30 mm and weighing 50 grams. All charge one battery at a time, with the exception of the D-LUX/C-LUX charger which actually charges two batteries at once.
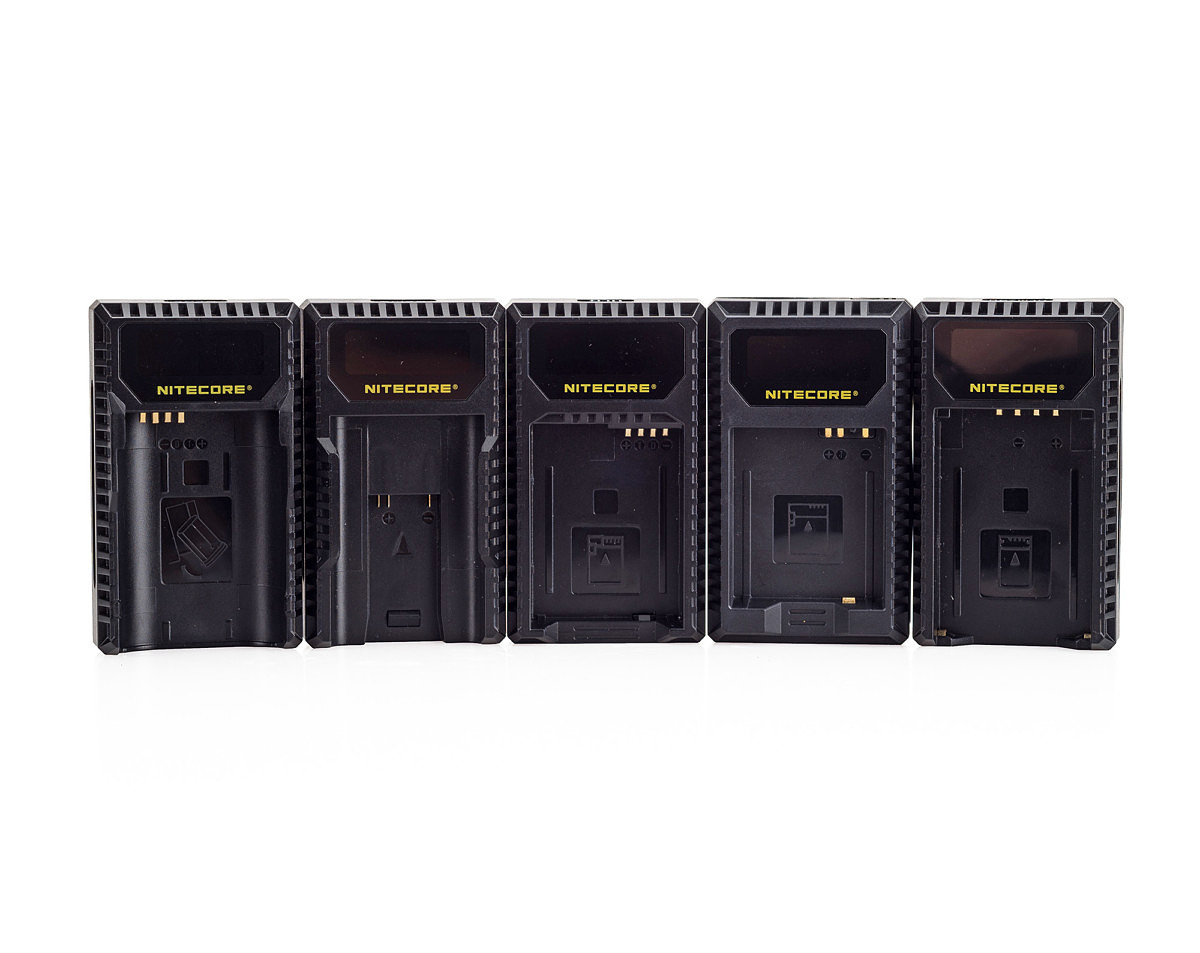
The Nitecore chargers for Leica Cameras
Aside from their small size, by far the most useful feature of the Nitrecore chargers is that they charge over USB versus using the standard “figure eight” wall outlet cord, or flip-out prongs, that the Leica’s own chargers use. This means you can charge up your batteries from a portable battery power bank, similar to how you may charge a smartphone on the go. It also works with solar chargers and you can even charge from a computer USB port. Or a USB port in your car (or airplane). What a gift for travel photographers, who may be miles away from a power outlet when they are out shooting. In theory, with a good-sized power bank, two batteries could last for days and days of shooting without ever needing a wall outlet.
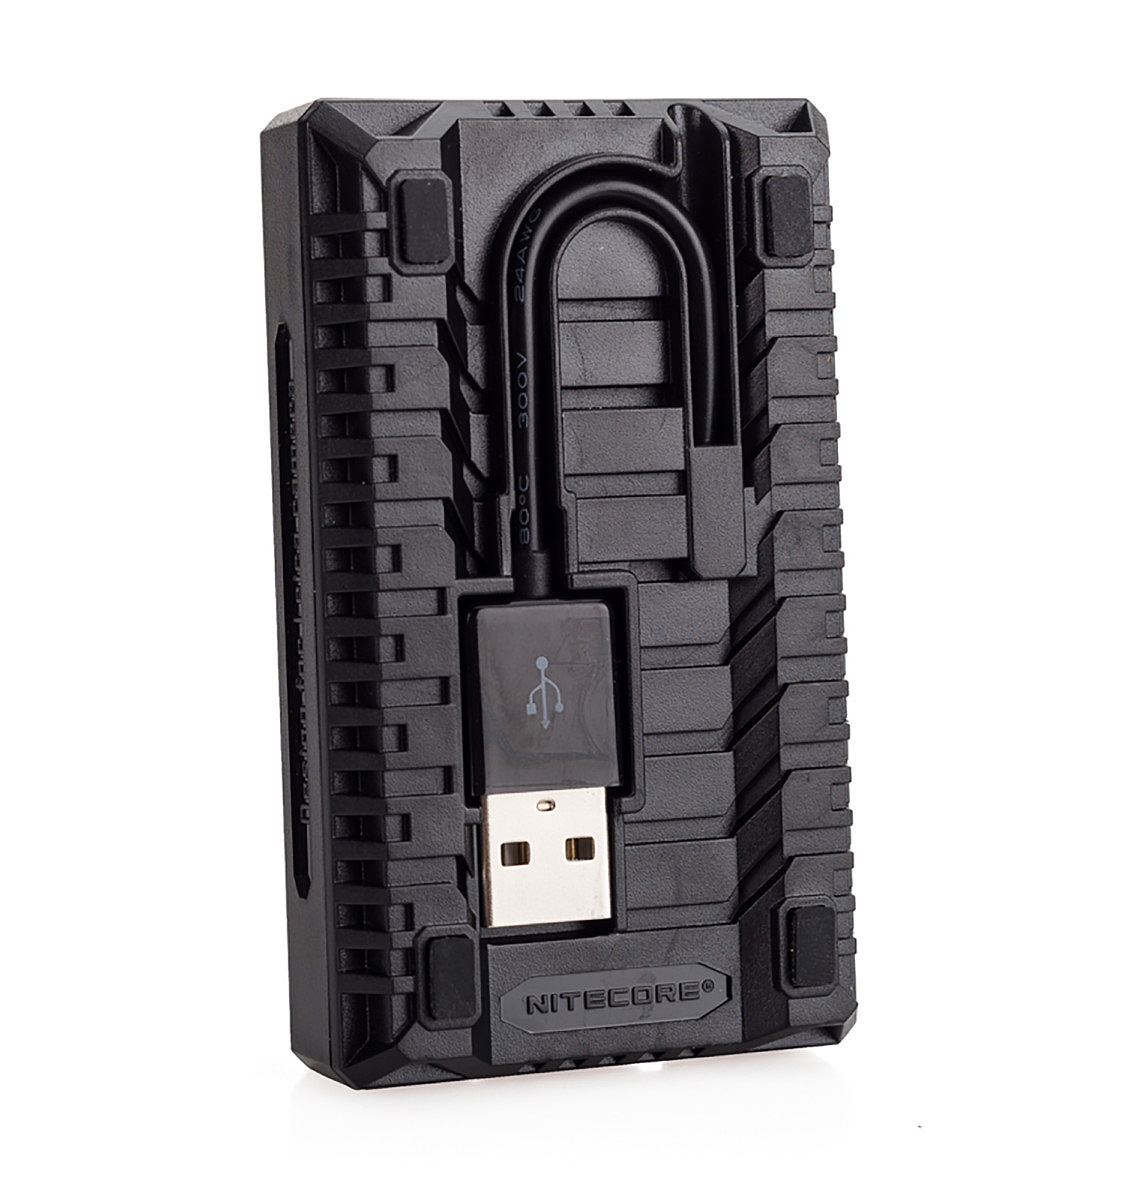
Each charger features a built-in USB cord that tucks away neatly when not in use.
Of course, it’s still fastest to charge over wall AC power and that is easy to do here. I would say most people I know have at least one, if not a small collection of USB outlet adapters. They come with just about every smartphone, tablet or other electronic device with a battery, and they’ll all work with the Nitecore chargers. Results may vary in terms of charge times (more on that later) though. Nitorecore makes their own USB power adapter if you need one. It is also worth mentioning that the built-in USB cord is quite short, so a USB extension cable is recommended most of the time if you are charging from AC power.
Leica’s own battery chargers lack any meaningful information about the battery or the charge status, beyond “charging,” “80% charged,” and “fully charged.” The Nitecore chargers all have a small screen which provides much more detailed information. The screen cycles automatically between two different displays, the first of which you can see below:
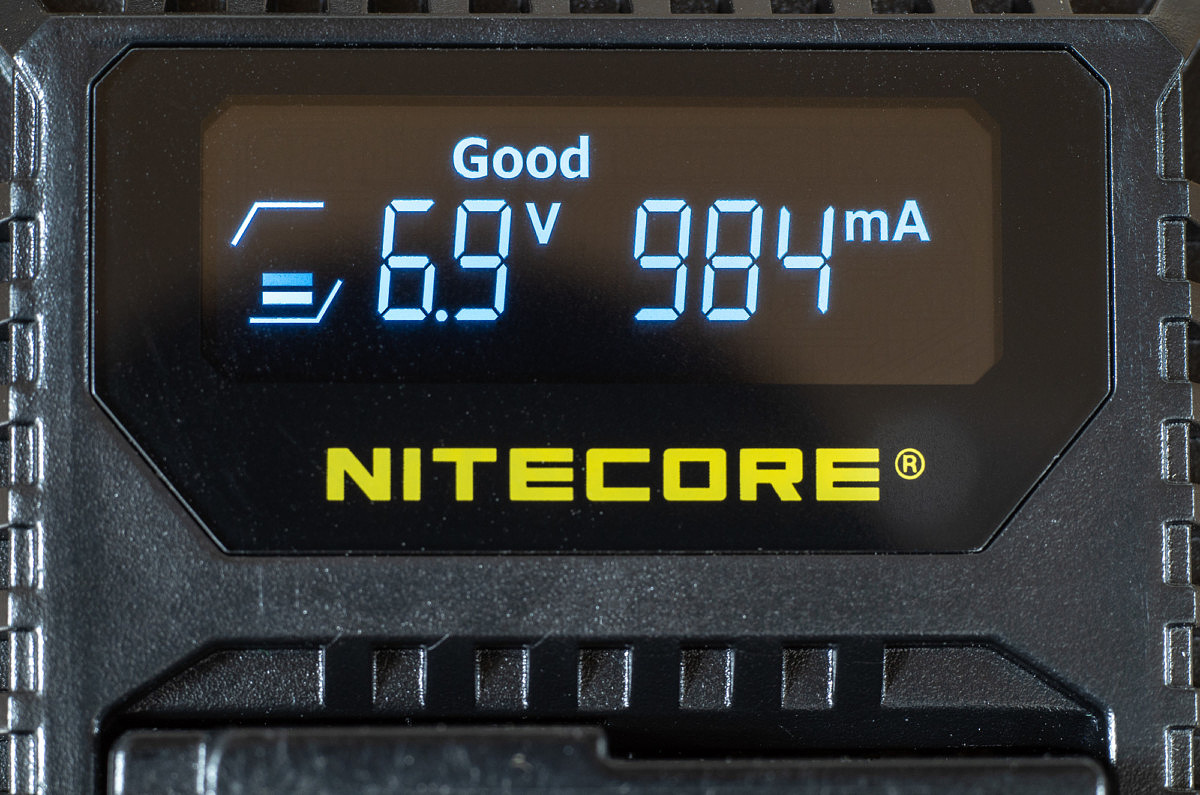
Here I am using the Nitcore ULQ charger for Leica’s BP-DC12 battery used in the Q, CL and V-LUX. Starting from left to right, the first thing you see is a series of small “blocks” inside brackets – this is visible on both display screens. That is the battery charging status bar. When the blocks reach the top bracket, the battery is fully charged. The word “End” will also appear on the right side of the screen when charging is complete.
Next, we see the voltage the battery is putting out, 6.9 volts in this case. Then we see a reading of 984mA which is how much current is flowing into the battery through the charger. With Nitecore’s USB outlet adapter I am nearly at the charger’s maximum potential mA rating of 1000mA. Using an iPhone power adapter, for example, I maxed out around 700mA but I could get close to 1000mA with a larger iPad adapter. However, with an older, small power bank I never saw more than 100mA. The more current flowing, the faster the battery will charge. Above those readings we see the word “Good” which is the battery’s health. “Good” represents the best possible rating – below that would be “Normal” then “Poor.” If you see Poor, best to dispose of the battery or at least relegate it to backup status.
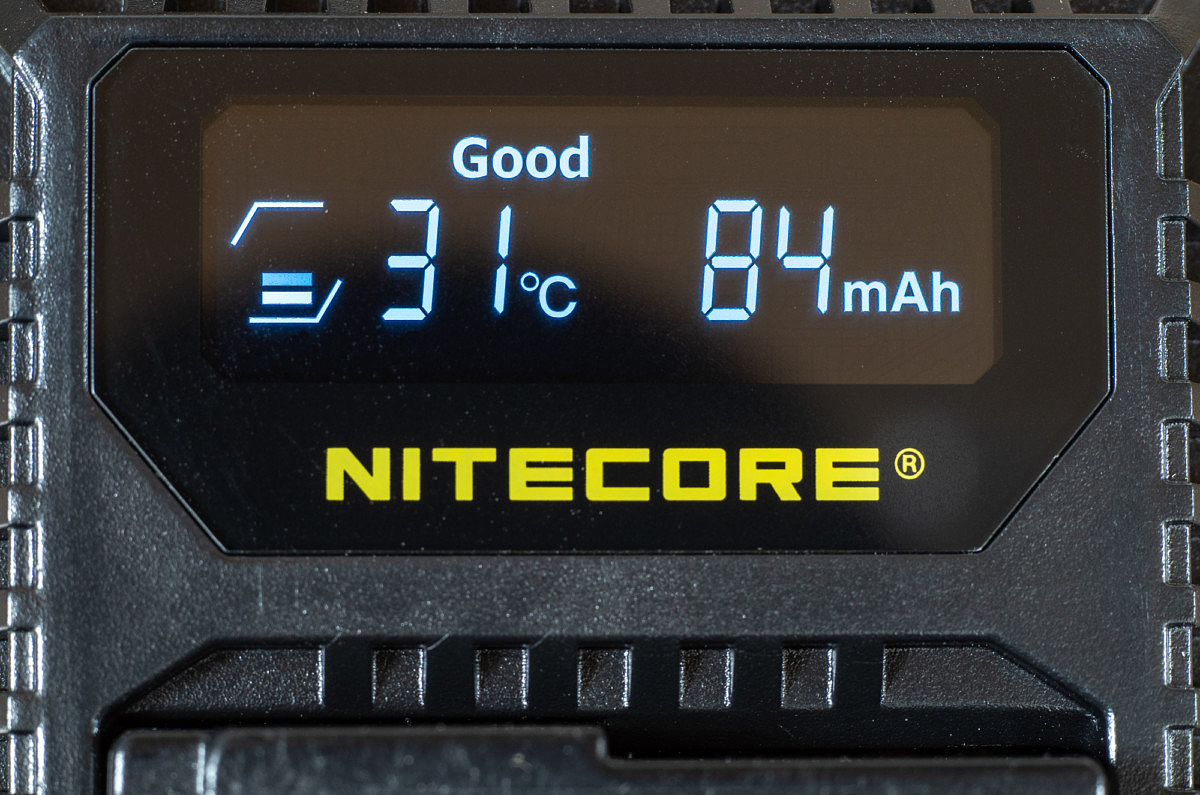
The second display cycled in still shows the charging status bar on the left, and the battery health above. However now we see the current temperature of the battery (31 degrees Celsius when I took the photo) and next to that, a measurement of how much charge has been sent to the battery – 84mAh in this case. Do note that this number resets to zero when you unplug the charger or remove the battery.
Obviously this is FAR more information than any of the Leica chargers provide. The “battery health” display alone is a killer feature, letting me know when it’s time to replace a bad battery. Plus I’m able to see how much current is flowing, so I know the quality of the source I am using to charge. All Nitecore chargers are designed to automatically stop the flow of current when the battery is fully charged as well, which means I never have to worry about overcharging.
Needless to say, these will be my new “go-to” chargers for all future adventures. Their small size and flexibility will prove quite useful. It’s also worth mentioning that Nitecore has indicated an M10 charger is in the works, which we’ll hopefully see before the year is out.
All five chargers are priced at $60 each, and you can check out the full range online here:
For other articles on this blog please click on Blog Archive in the column to the right
_____________________________________________________________________
_____________________________________________________________________
 Buy vintage Leica cameras from
America's premier Leica specialist
http://www.tamarkinauctions.com/ http://www.tamarkin.com/leicagallery/upcoming-show

Buy vintage Leica cameras from
America's premier Leica specialist
http://www.tamarkinauctions.com/ http://www.tamarkin.com/leicagallery/upcoming-show
Click on image to enlarge
Order: info@gmpphoto.com
Please make payment via PayPal to GMP Photography
Click on image to enlarge
Order: info@gmpphoto.com
Click on image to enlarge
Order: info@gmpphoto.com
Click on image to enlarge
Order: info@gmpphoto.com
Please make payment via PayPal to GMP Photography
Click on image to enlarge
Order: info@gmpphoto.com
Please make payment via PayPal to GMP Photography
Click on image to enlarge
Order: info@gmpphoto.com
Please make payment via PayPal to GMP Photography


No comments:
Post a Comment