
By David Farkas, Leica Store Miami
Today, Leica Camera has
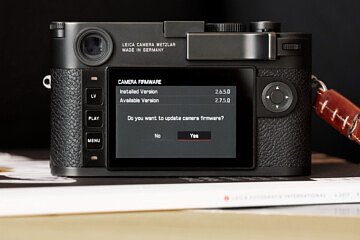
released firmware version 2.7.5.0 for its M10, M10-P and M10-D digital
rangefinder cameras. The firmware primarily addresses a few small bugs while
adding stability and overall software improvements. Be aware that this is a
large update, taking significantly longer to install than prior updates. So, an
installation time up to 10 minutes is perfectly normal.
What’s New
The official firmware
notes, from Leica:
- Fast continuous shooting in Live View mode: Fixed screen freeze issue in ‘Continuous High’ mode while using Live View.
- Incorrect regional GPS information: There were regional deviations in the GPS information. This bug has been fixed. (Please Note: GPS functionality requires the use of the Leica Visoflex EVF)
- Stability of the connection between the camera and Leica FOTOS: Fixed connection issue between camera and app with more than 800 images on the camera.
- New QR Code for Leica FOTOS. (Not for M10-D): The camera generates an optimized QR code for the connection to the app.
- General software improvements for operating stability.
Video Walk-through
We’ve put together a short
video to walk you through the full update process, step-by-step on the M10 or
M10-P. For M10-D, please skip down to the written instructions below.
For video go here
To install the firmware on
your Leica M10 or M10-P, follow these steps:
1. Insert a fully charged
battery into the camera
2. Download the new firmware
file to your computer
3. Prepare the SD card for
installation:
1. Make sure that the card
contains at least 200 MB of free disk space
2. It is recommended to
format the card inside the camera before continuing
3. Download the new firmware
file to your computer
4. Copy the firmware file to
the root directory of the SD card
5. Eject the SD card properly
from your computer
4. Insert the SD card into
the camera and switch the camera on
5. Go to Main Menu / Camera
Information / Camera Firmware
6. Press “Yes” to confirm and
start the process;
1. Please confirm to save
your current profiles to SD card before proceeding with the update
2. Wait until the update
installation is completed
3. Restart the camera, do not
eject the SD card
7. Please load your last
profiles from SD card after the first startup
8. The update process is
complete
To install the firmware on
your Leica M10-D, follow these steps:
1. Download the new firmware
file to your computer.
2. Prepare the SD card for
installation:
1. Please make sure that the
card contains at least 200 MB of free disk space.
2. It is recommended to
format the card inside the camera before continuing.
3. Download the new firmware
file to your computer.
4. Copy the firmware file to
the root directory of the SD card.
5. Eject the SD card properly
from your computer.
3. Insert the SD card into
the camera while camera is switched off.
4. Press and hold the
function button at the top of the camera and switch on the camera
5. “UP” will appear in the
viewfinder during the update process (In case of an error, “ERR” will be
displayed)
6. “END” will appear after
the update is completed
7. The update process is
complete.
To download firmware directly go here
For other articles on this blog please click on Blog Archive in the column to the right
For other articles on this blog please click on Blog Archive in the column to the right
_____________________________________________________________________
_____________________________________________________________________


 Buy vintage Leica cameras from
America's premier Leica specialist
Buy vintage Leica cameras from
America's premier Leica specialist

 http://www.tamarkinauctions.com/ http://www.tamarkin.com/leicagallery/upcoming-show


Buy vintage Leica cameras from
America's premier Leica specialist
http://www.tamarkinauctions.com/ http://www.tamarkin.com/leicagallery/upcoming-show
Click on image to enlarge

Order: info@gmpphoto.com
Please make payment via PayPal to GMP Photography
Click on image to enlarge
 Order: info@gmpphoto.com
Click on image to enlarge
 Order: info@gmpphoto.com
Click on image to enlarge

Order: info@gmpphoto.com
Please make payment via PayPal to GMP Photography
Click on image to enlarge

Order: info@gmpphoto.com
Please make payment via PayPal to GMP Photography
Click on image to enlarge

Order: info@gmpphoto.com
Please make payment via PayPal to GMP Photography
No comments:
Post a Comment